Category Archives: Repair Logs

This blog contains my previous Arcade Repair Logs moved to blog format. It is also where new logs will be created.

Capping Punch-Out!!

Well, I finally got around to capping the two monitors on my Punch-Out!! game, and let me tell you, it is a serious pain in the ass!

It is bad enough that the Sanyo 20-EZ monitors are pains to cap in the first place, there are even more so when mounted horizontally in a narrow cabinet! Took more than three(!) hours for me to do the first (upper) one. The second one was a bit faster, clocking in at about 1 hour and 45 minutes.

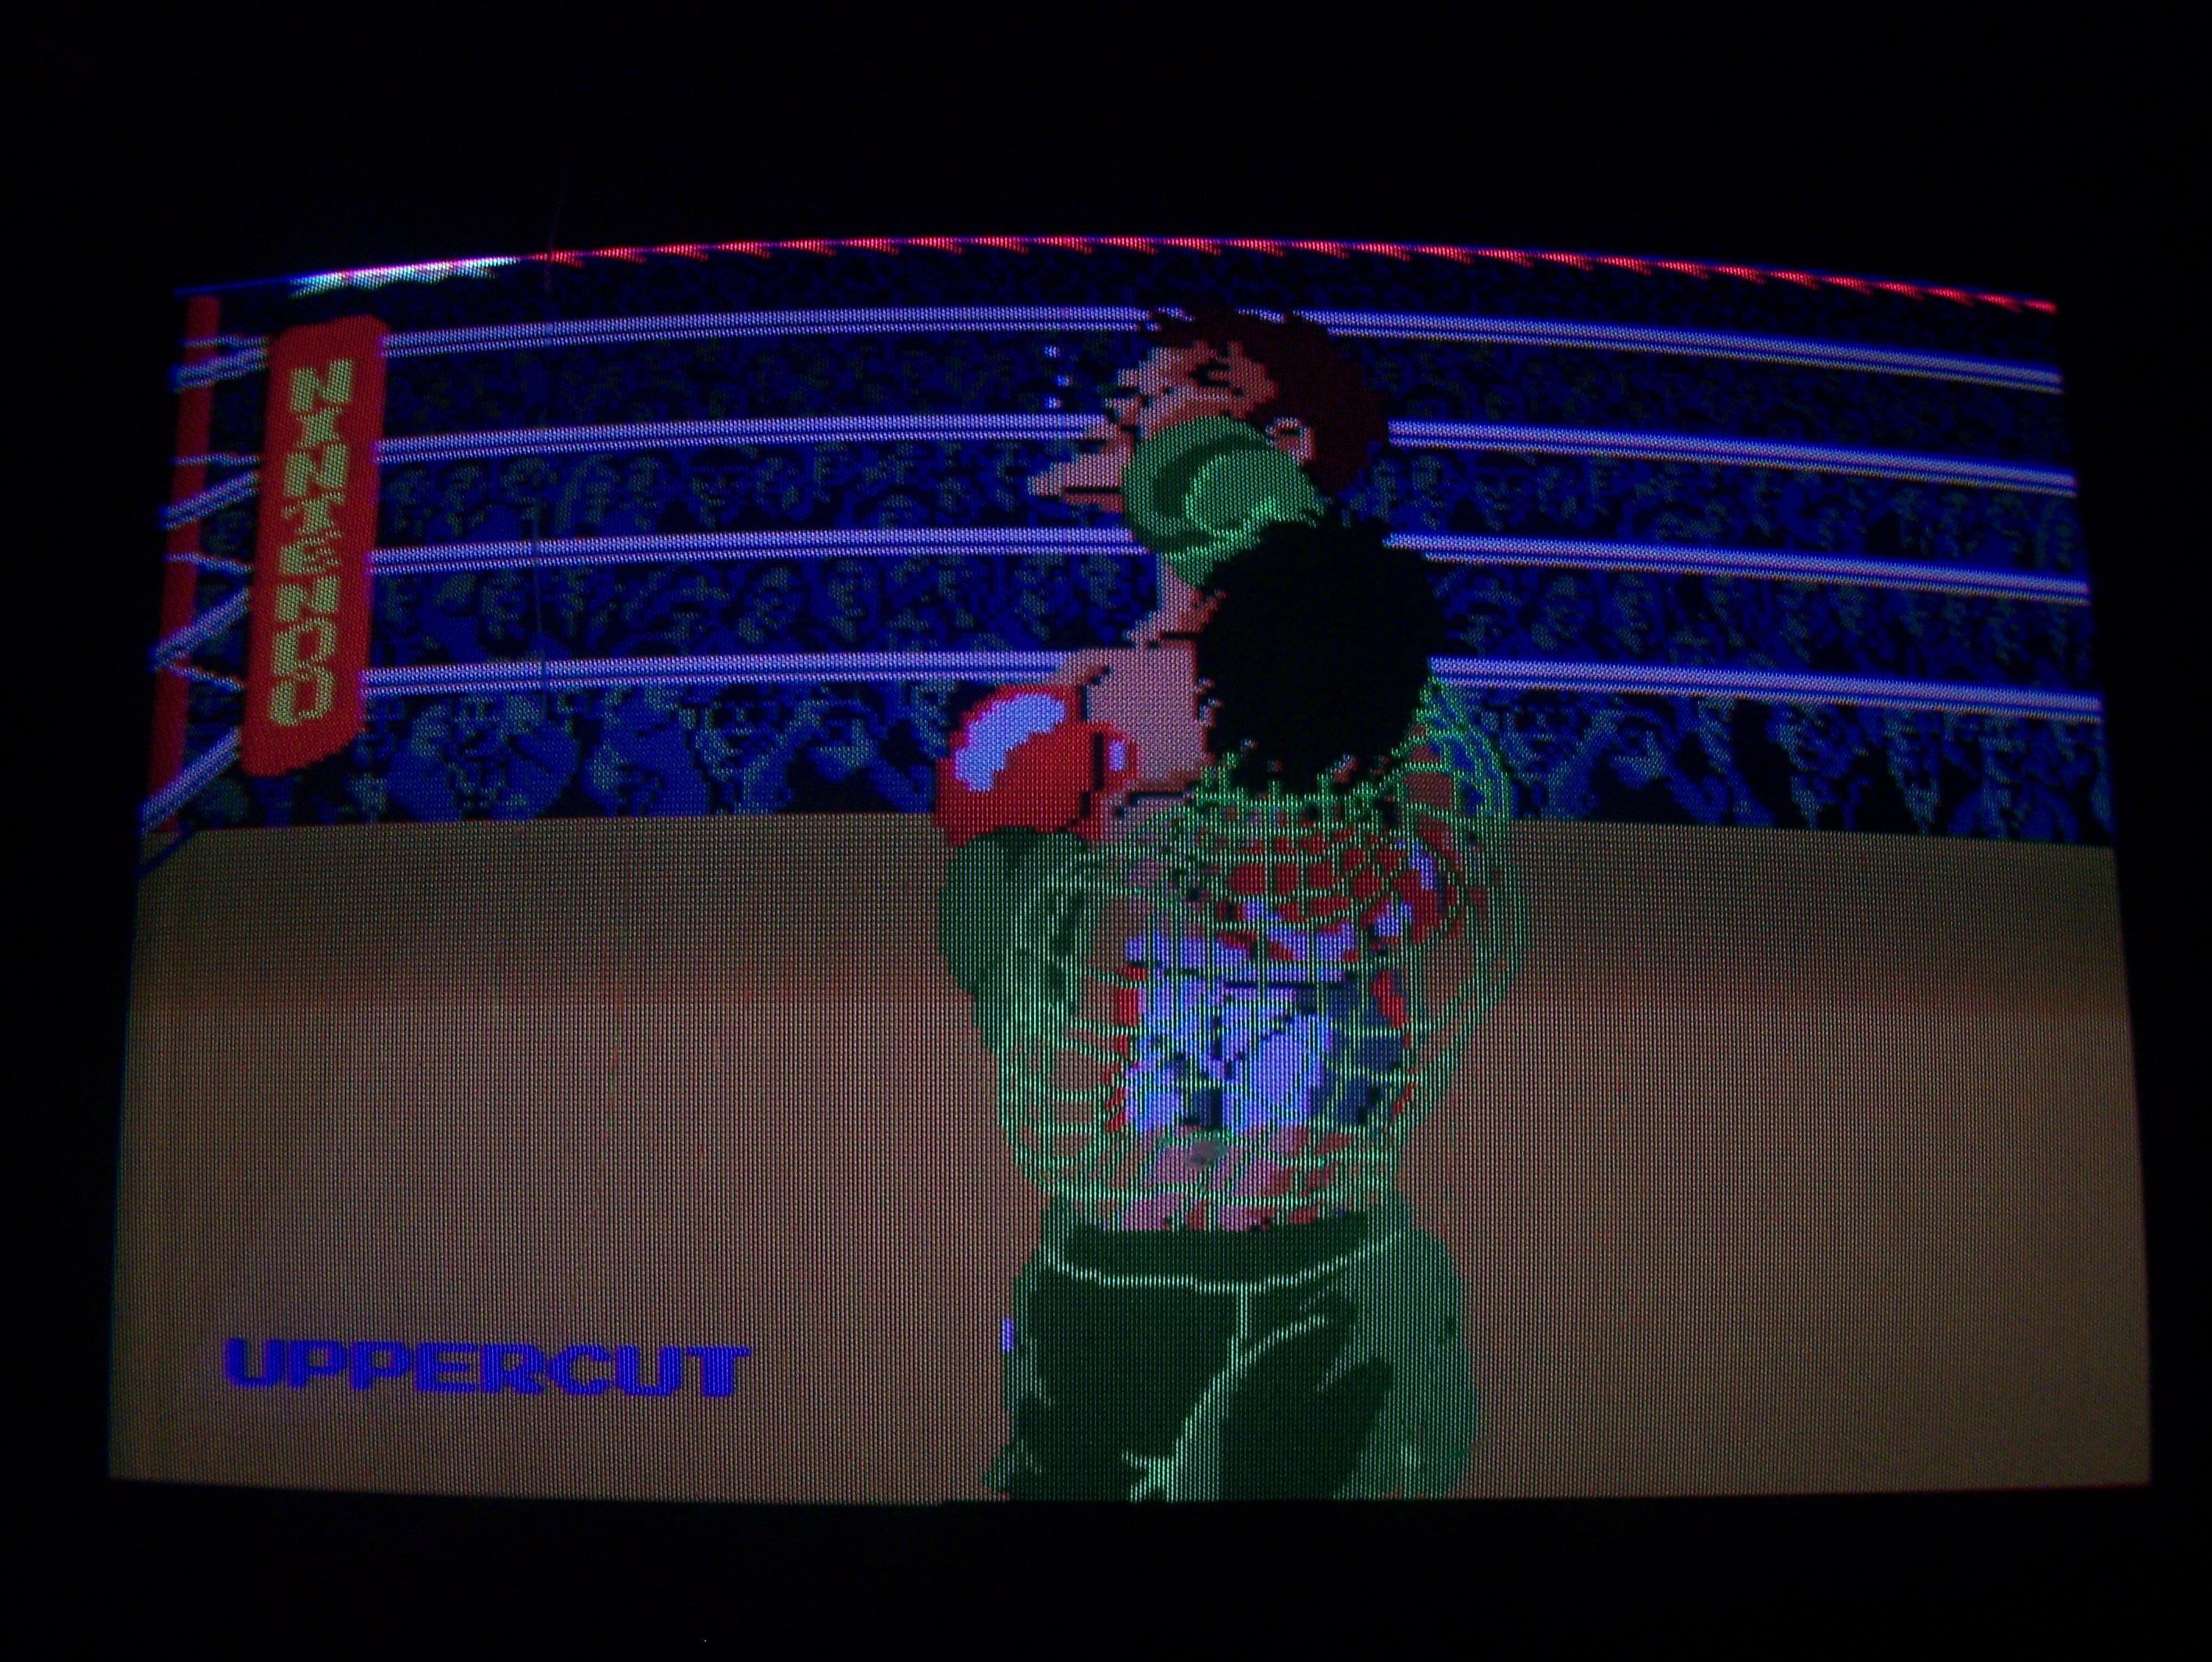
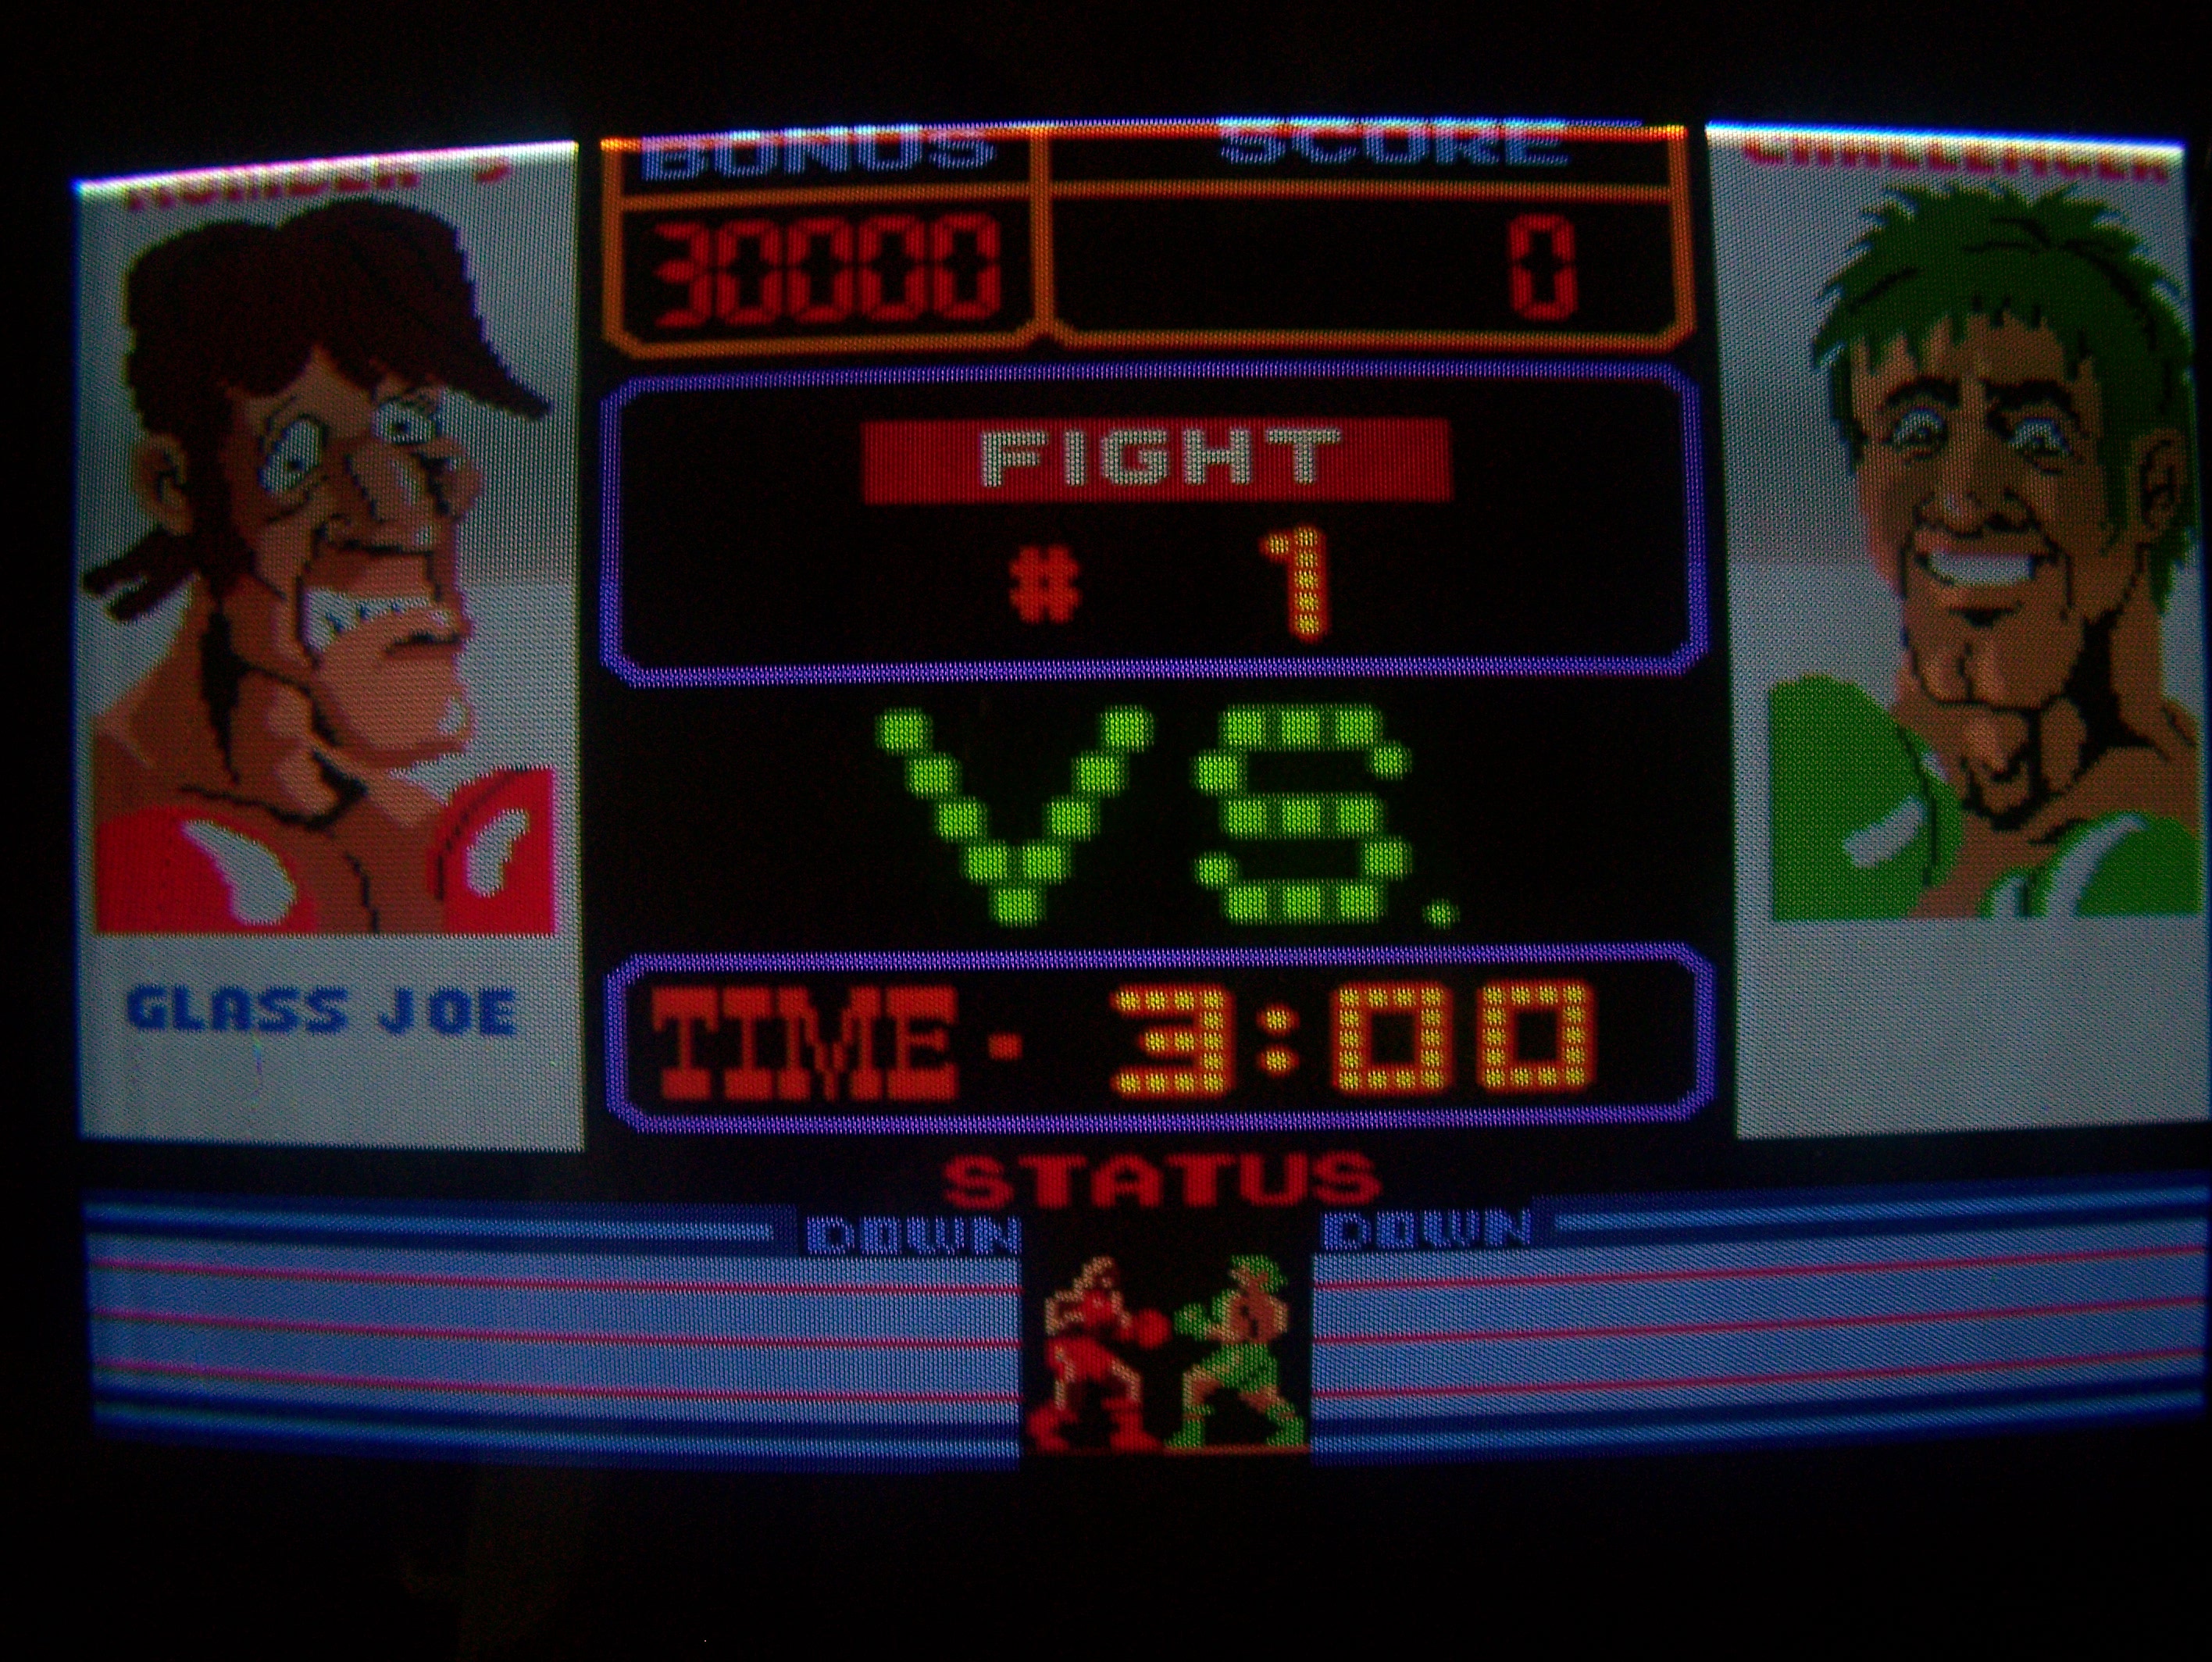
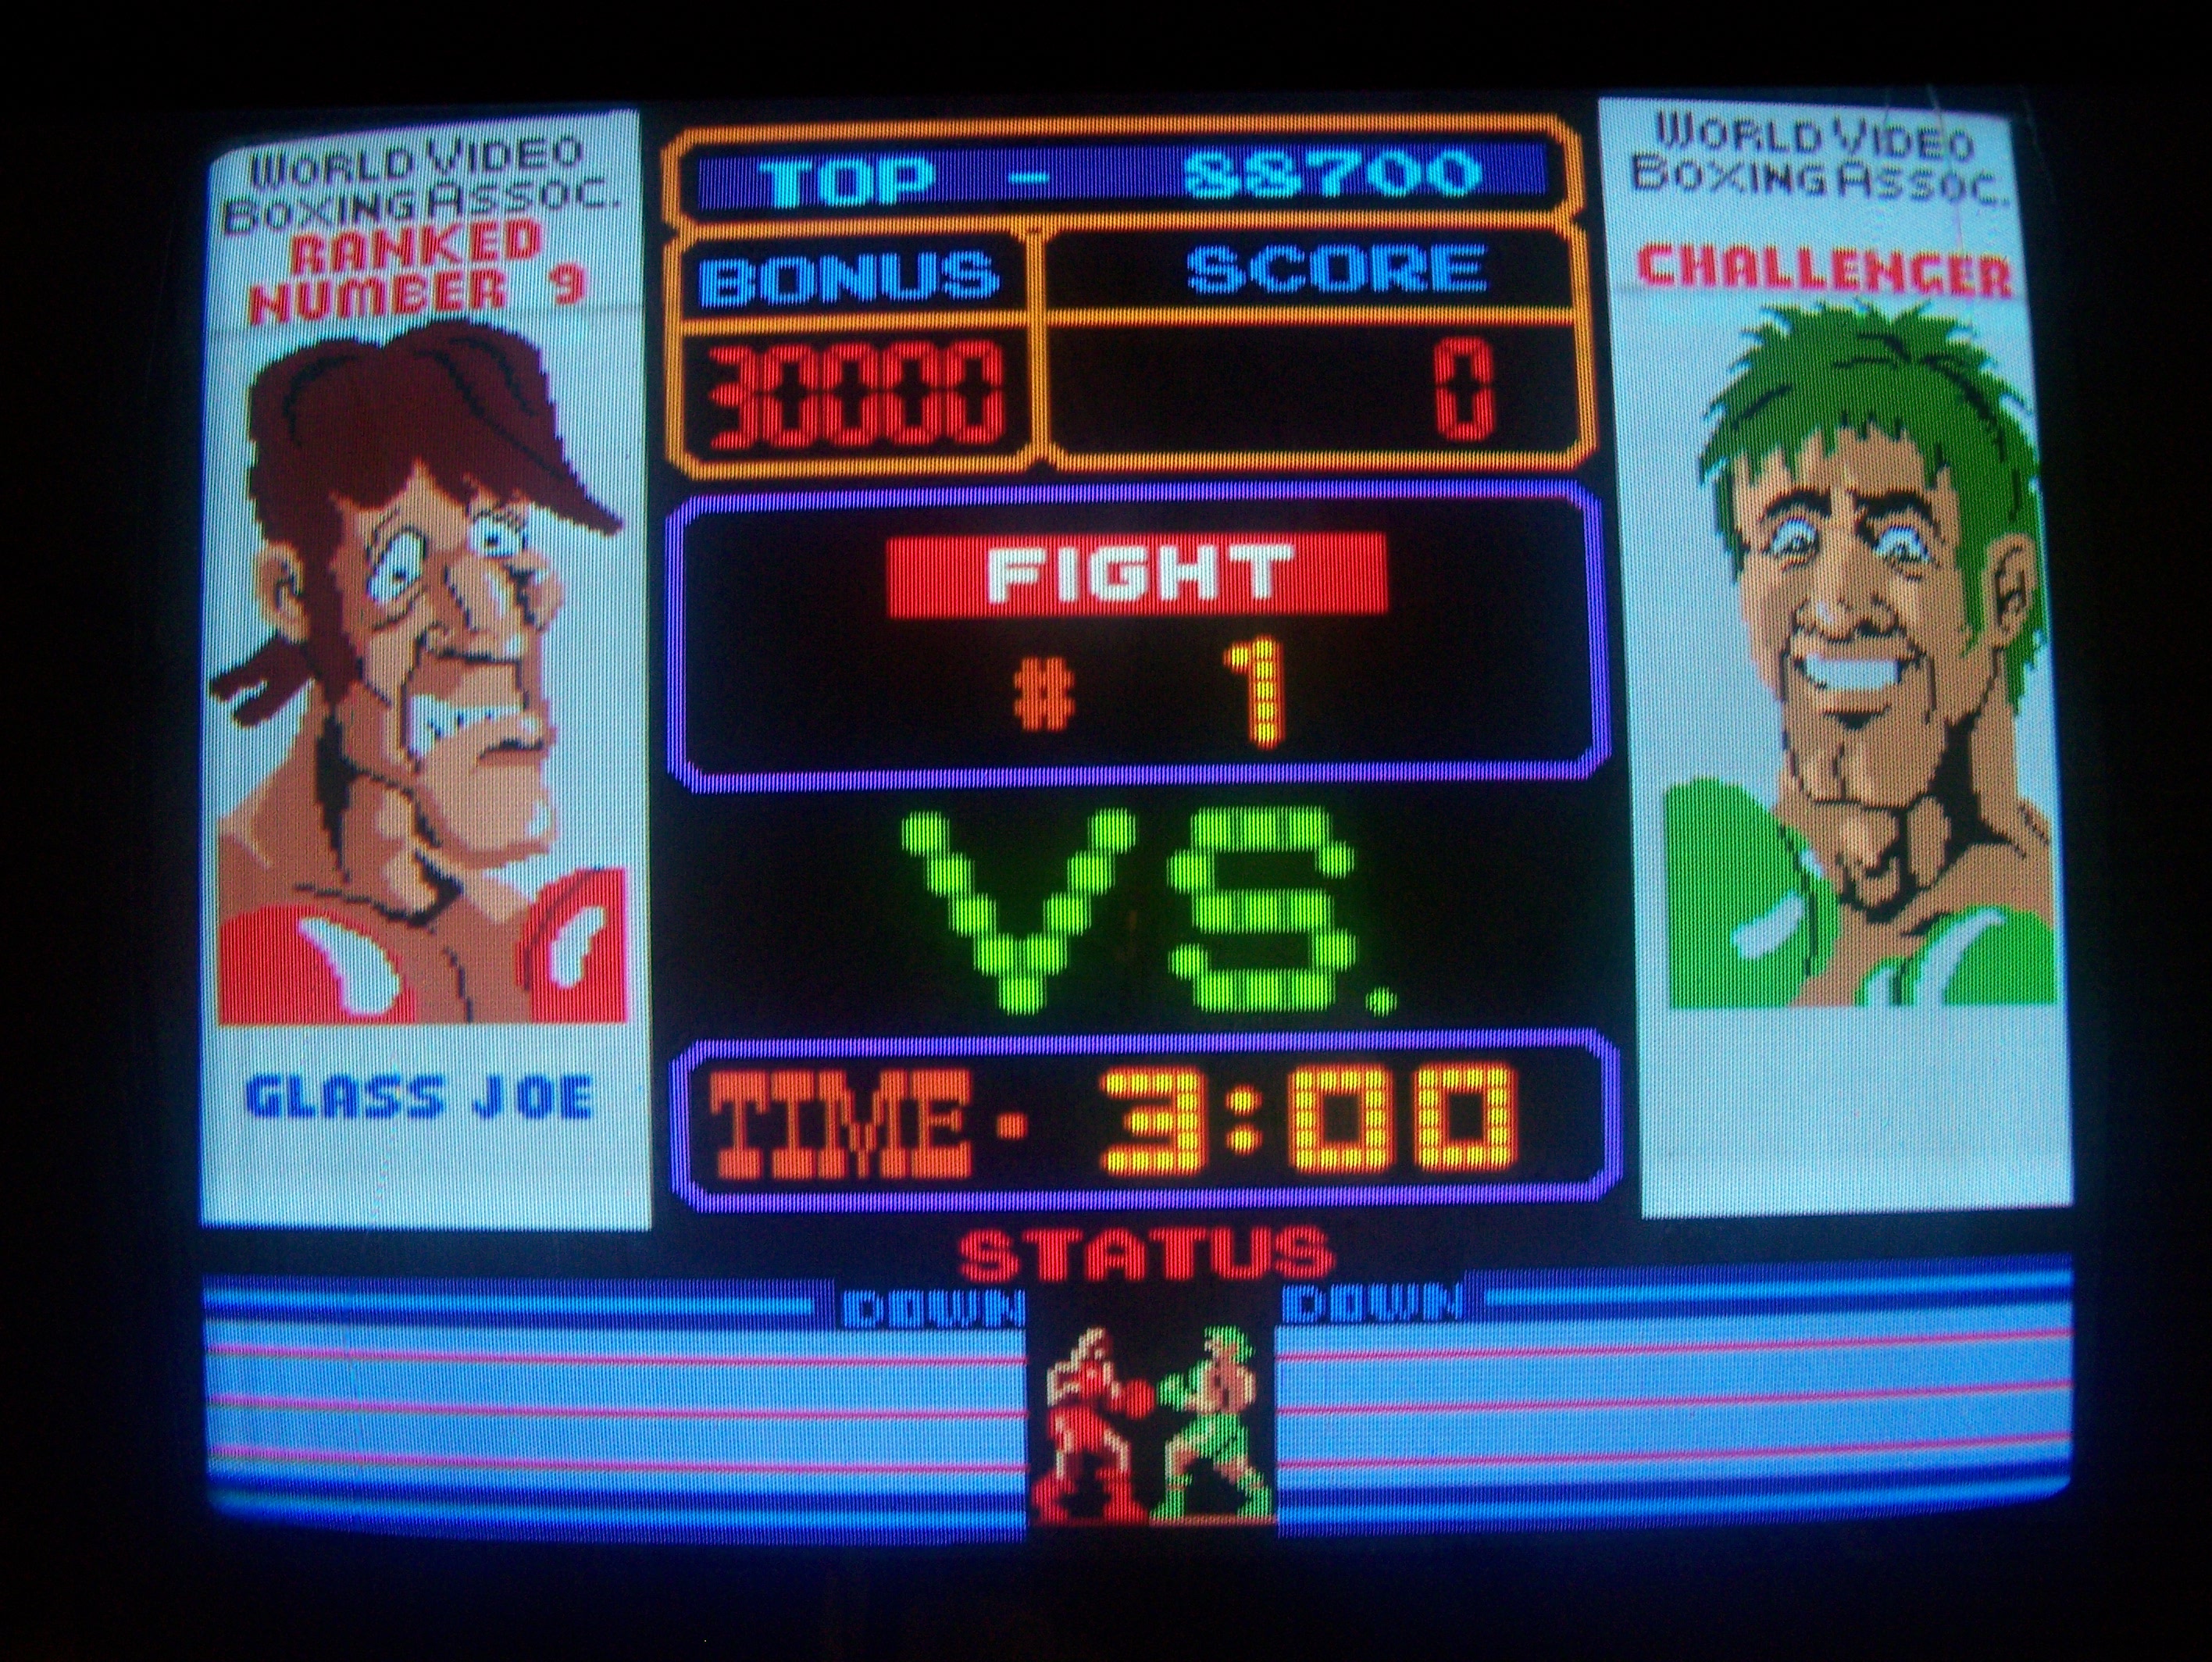
A bit of hard work, to be sure, but the results speak for themselves:

Before: Top Monitor Before
 

After: Top Monitor Before

Also, note that there is screen burn from the collapsed line that was there before. This means that the game was in operation for a long time while it needed a cap kit!

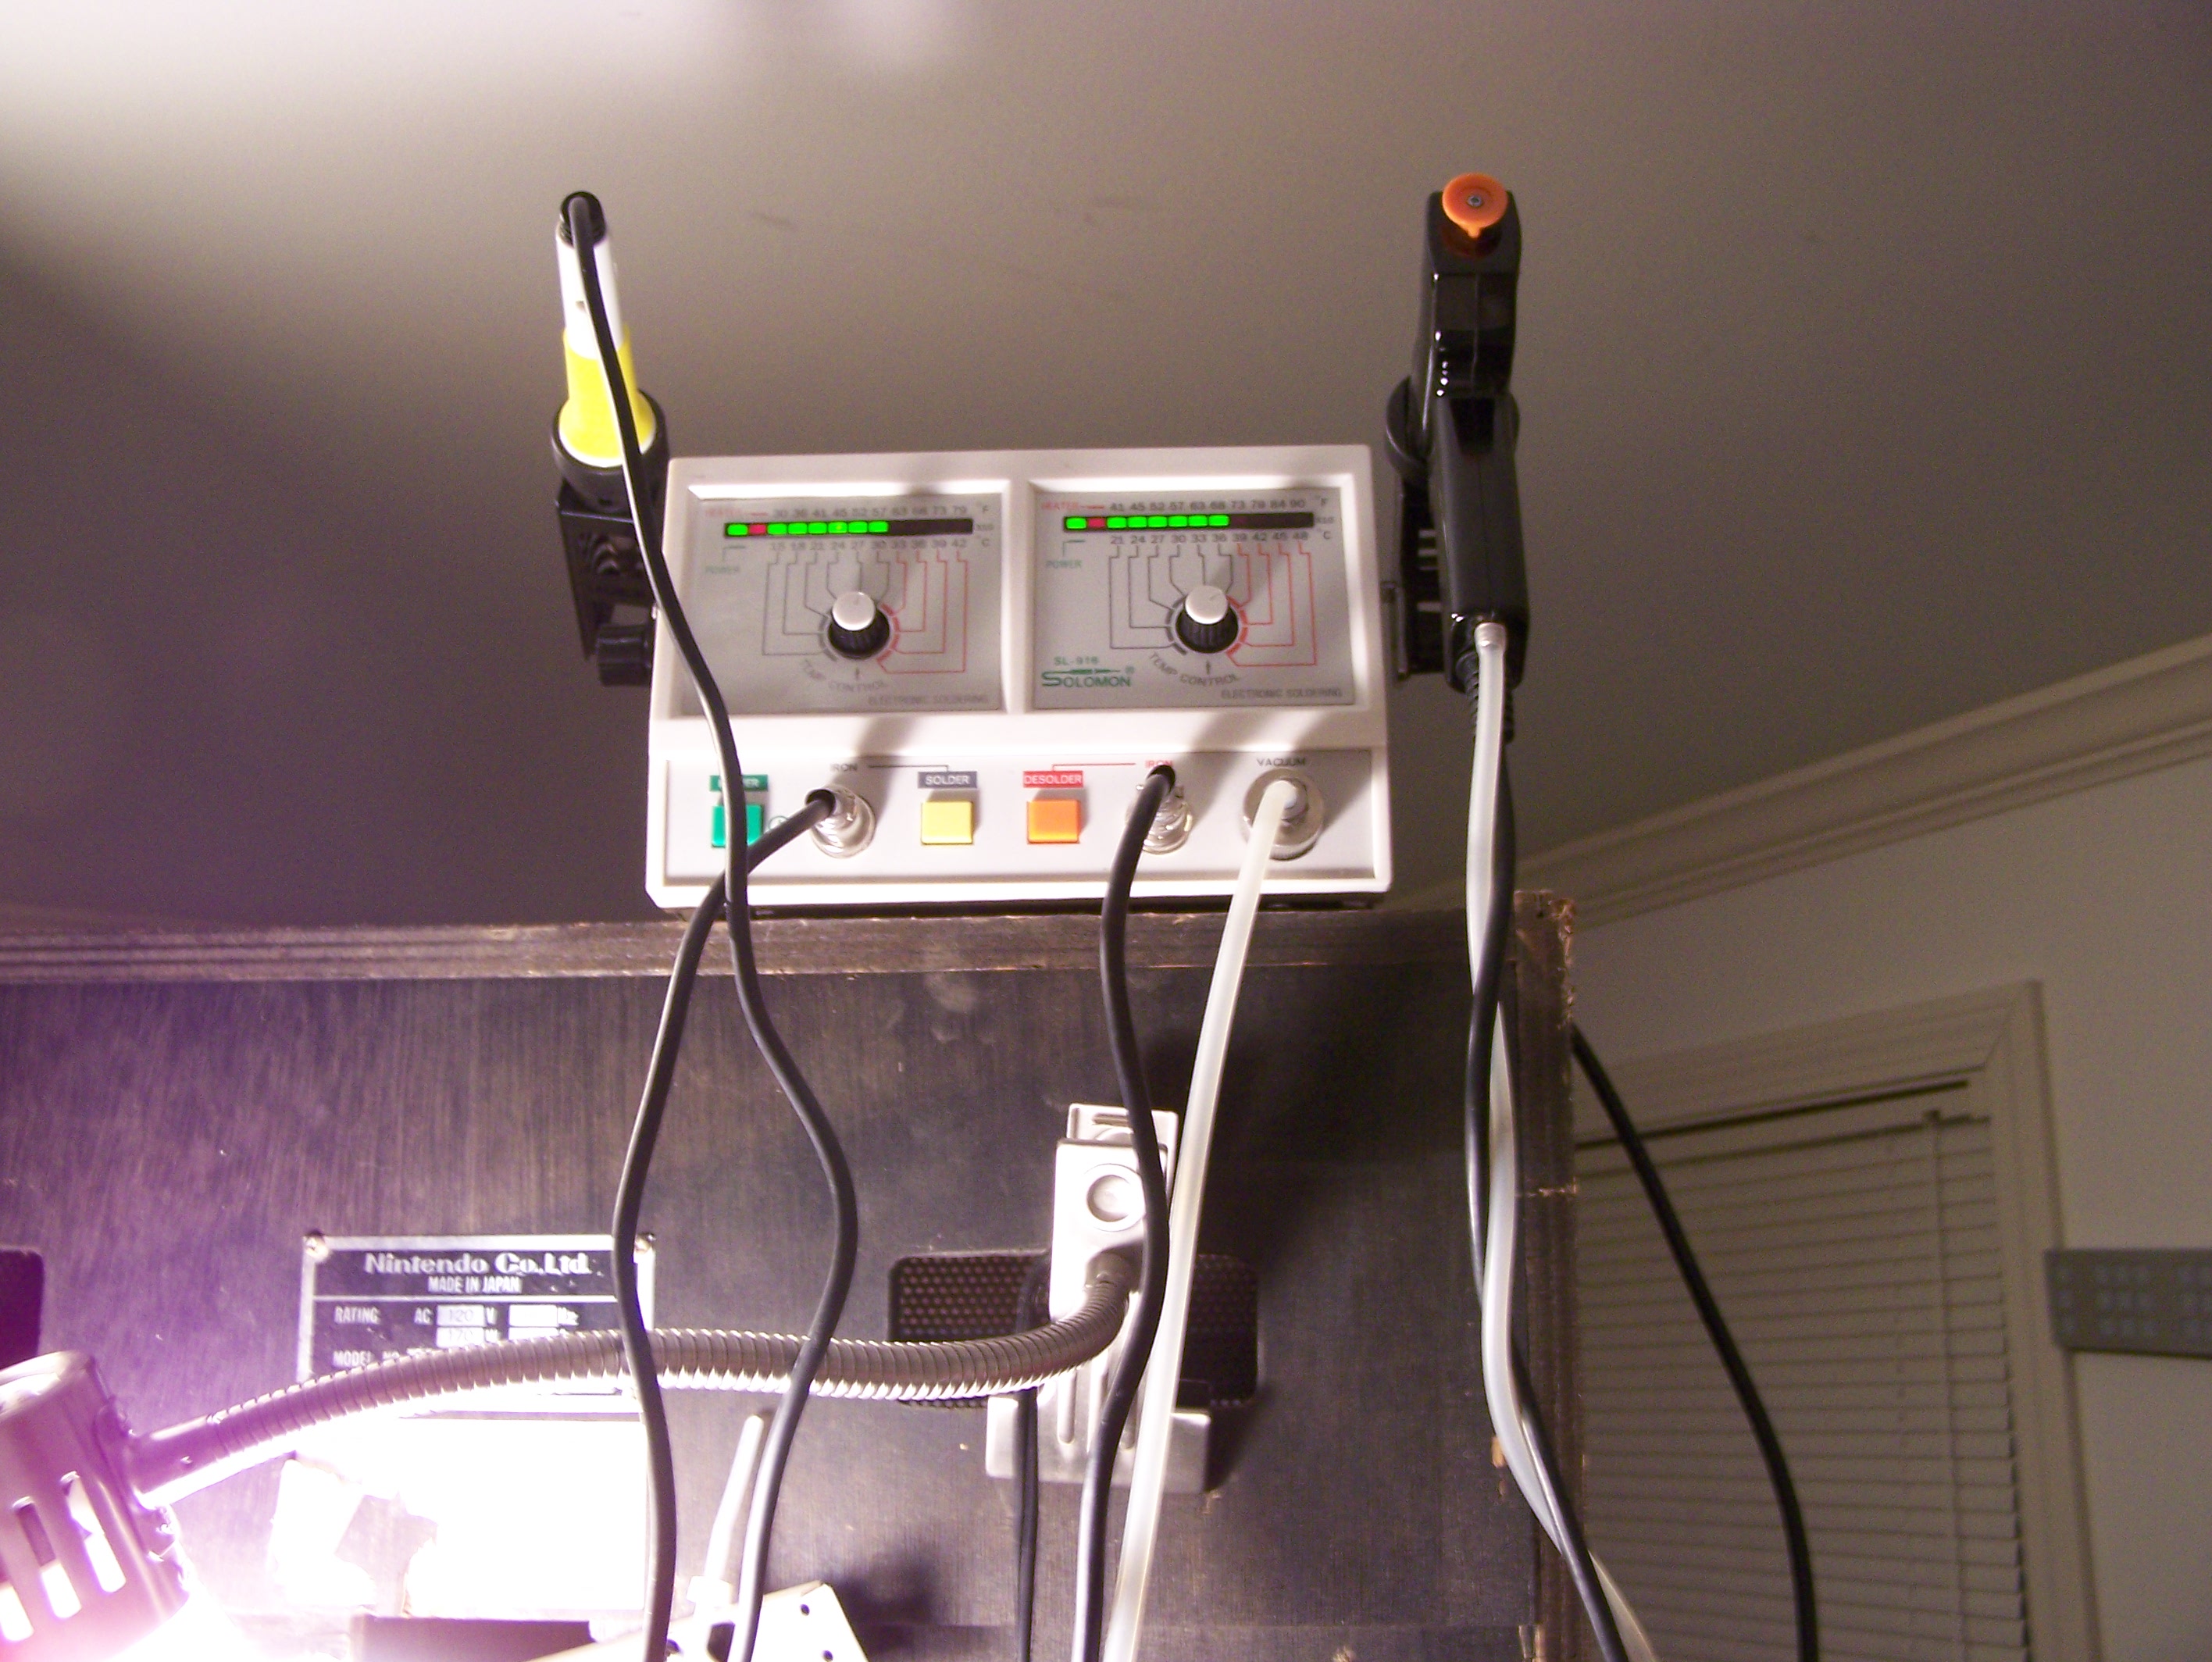
While working on the monitor chassis boards, I was never more happy to have purchased a soldering and desoldering station a couple of years ago (shown sitting atop the Punch-Out!!):

Soldering/Desoldering Station
And here you can get a shot of how I had to work on the board – dangling out of the cabinet, wires everywhere:

PCB Hanging Out
Oh, and how do ‘ya like my nice little way of securing the PCB in the air while I work on it? 🙂

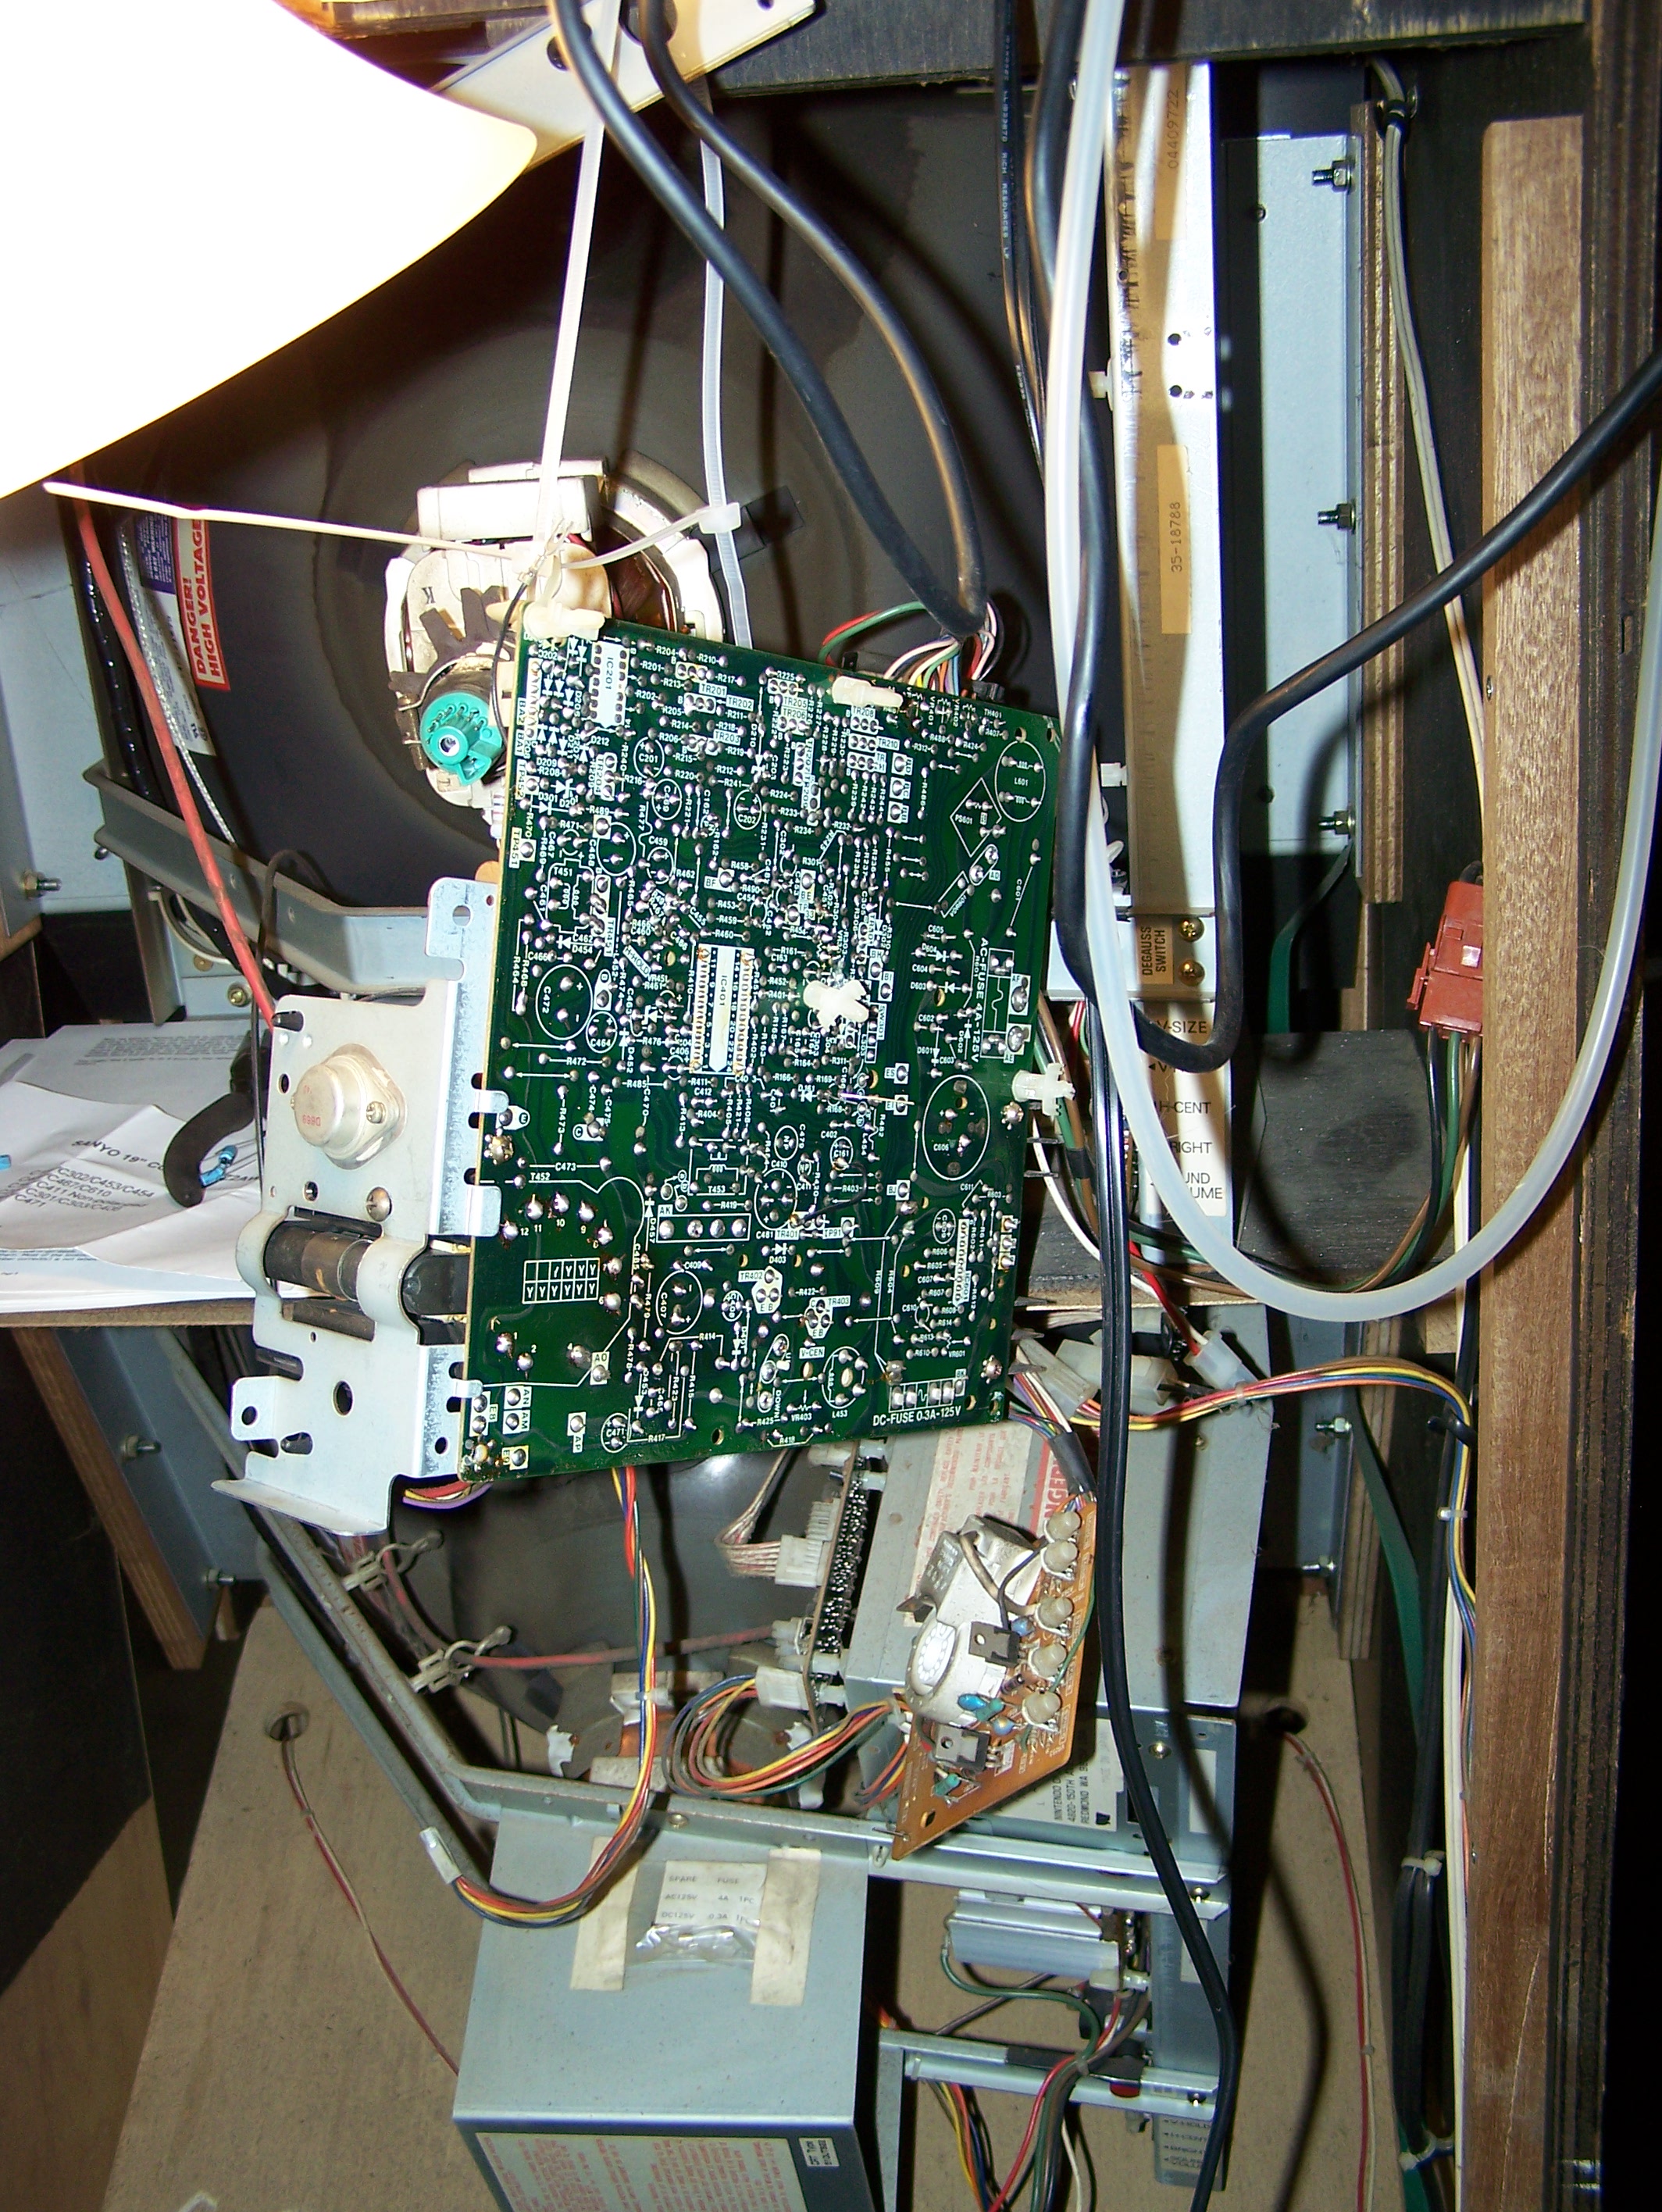
Much thanks go to The Real Bob RobertsTM for the cap kits (I purchased the 20EZ Plus kit, which has 9 additional chassis caps), and to Brien King (no, I did not misspell Brien), which has a step-by-step guide to getting the chassis PCB out of the Sanyo 20-EZ monitor at Arcade Restoration Workshop. I used the document for the first monitor, and tackled the second one from memory.

I also cleaned and changed the spring on the joystick. It is no longer as sticky as it was before thanks to getting all that old dirty grease out of it. However, it is still far too loose for my taste. It is playable, and I have played games in the arcade in far worse condition, but it still would be nice to have it a bit stiffer.

Also replaced the batteries in it so that the high score table works correctly again. Surprisingly, there is not a lot of corrosion in there.

OK – I think it may be ready to sell soon…!

Sprint 2 – Stiff Steering and Hard Shifting

Problem: Stiff spinning steering modules and hard shifting between gears

(Quick little story – while bringing this beast into its location, I fell and got pinned under it for a few minutes. It is amazing how much having your chest compressed effects your ability to call out for help! 🙂

OK – onto the next issue… Its steering wheels were pretty stiff, and if you tried to give them a good hard spin they would come to a halt within a couple of turns. Removing and disassembling them was easy. Turns out the problem was that the old grease in them had coagulated/thickened so that it was about as viscous and sticky as cold honey!

Getting the grease out of the barrel and off of the shaft and sleeves literally took ~10 minutes (for each module) with some rubbing alcohol, elbow grease and rags. I had a friend helping me (Sean) and we each tackled one sterring wheel each.

After getting that old gunk out, a quick application of some light lithium grease on everything solves that problem – the wheels will now spin for at least 10 turns easily.

For the shifter modules, I just applied some powered graphite to the shifter “ball” at the opening of the shifter and after a few shifts to get it all around, the shifts are much easier now.

Solution: Cleaned and lubricated the steering modules, lubricated the shifter modules.

Note: One of the steering modules has a broken shaft/cone, which caused the wheel to be off-center, and it was being held in place strictly by the force of the retaining bolt that goes through the entire assembly. I managed to get it a bit straighter than it was before, but it still is broken internally. Not sure if I want to go through sanding down the two halves to try to get them melded or epoxied together – I am afraid of shortening the cone too much and causing problems. The wheel works and the game is playable, so I might just leave it as it is.

Punch-Out vertical foldover/overdraw

The Punch-out that I recently obtained has a monitor issue (a monitors issue, really). Both displays are bring drawn starting ~2″ from the bottom of the monitor, and the upper few inches are being overdrawn on the same horizontal plane.

In other words, the beam is scanning left/right correctly but is starting too low and is not going high enough (vertically) to complete drawing the image correctly – the beam stops going up and keeps trying to draw the rest of the screen on the same horizontal line, causing a higher-intensity line to be seen (images below, apologies for their quality – I guess I shoulda taken off the Plexiglas first).

Top Monitor Overdraw Bottom Monitor Overdraw

The overdraw is visible in the image, but it is not obvious from the images that the bottom of the image is ~2″ higher than it should be. The overdraw looks like a classic capacitor problem to me, although I admit that I am not that familiar with the “starting too high” problem and I am guessing that the two are related. At least, the two things being related kinda makes sense in my mind…

I have cap kits from The Real Bob RobertsTM (highly recommended for all kinds of arcade-related parts, BTW!) for the monitors and will be capping them shortly.

More to follow…

Sprint 2

Problem: Static garbage on screen

Purchased a Sprint 2 in non-working condition. Saw a picture of it, monitor worked – it showing what appeared to be static garbage on it. Got it home and confirmed that yes, it is showing static garbage (first image below). Turning it off for a couple of seconds and then back on again keeps pretty much the same garbage display, but sometimes gets some sounds out of it (engine and/or screeching sounds). Moving the self-test switch does nothing. First suspect that CPU is not running, because the screen is static (i.e. not changing while the game is on).

Sprint 2 - Before

After checking the usual suspects (voltages, loose wires, harness/wire burns because this is an older Atari game…), I yank the CPU to see if I get the same results (to narrow it down to the CPU). This causes a different effect, a screen filled with a single character and I get sound, so I presume for now that the CPU is working and the problem lies elsewhere.

Continue reading Sprint 2

Punch-Out

Problem: Dead

Purchased a Punch-Out in dead condition.  Got it home, still dead.  Rocking the game and/or whacking the sides a bit got a brief flash of light on it so I went in and reconnected all connectors.  Game then came up right after that.

A little adjustment to the micro-switch arms and the game is playing nicely.  Still need to rebuild the joystick as it is stiff and sticks a bit.

Solution: Re-tighten/reattach all (power?) connectors

Goindol

Problem: Board boots but does not complete POST. Halts with some on screen garbage displaying BAD ROM 5 on more often than not. ROMs were clearly marked on the board, so I yanked ROM 5, read it and ran it through ROMCMP. It came up as unknown. Sounds bad to me!

Located a replacement ROM image and burned to a new EPROM (uh, after finding a replacement EPROM that would erase and burn correctly – that took a good hour and change). Verified the new EPROM was correct, loaded it into the game and…

BAD ROM 5

OK… I pull the board and start a visual inspection. Notice a section of the board with about 5 or 6 scratched traces. Two of them are broken (no continuity). Jumped them with some wire-wrap wire and the board comes right up! I do not yet have a way to test inputs yet, though…

Solution: Reburned ROM 5, jumped two broken traces. (Inputs unknown.)

Unknown Atari Kangaroo Board

I bought two or three sets of unknown/untested/bad boards sometime last year. I have recently started going through them to determine the severity of their problem(s). (This is taking a surprisingly long amount of time due to the time it takes to create a JAMMA adapters for each unique interface! :/ )

Anyhoo, I came across a complete, intact Kangaroo board last weekend! After creating a minimal adapter (Power and Video), the board came right up! I tried its self-test and it passed. After watching the attract mode for a little bit (~30 seconds), the game started to show some visual artifacts on the RHS of the screen. They were horizontal blurbs that looked like multicolor static. However, each of the blurbs, while in a random vertical location, were identical.

Continue reading Unknown Atari Kangaroo Board

Cook Race (bootleg Burgertime)

Some sprites are missing, but still in the game. For example, when you throw the Pepper, it is not drawn on the screen, but it still stuns the bad guys. One or two of the bad guys are also invisible, so Peter Pepper can effectively get killed by nothing!

Game does not draw garbage where these graphics/sprites should be, they are just never drawn at all, and they do not disrupt the background graphics (i.e. they are completely transparent) so I do not think that it is a ROM or RAM problem.

Not knowing too much about this kind of problem, my first guess is that the specific sprite(s) are not getting their data placed in the appropriate spot when it comes time to draw the required sprites. For example, they are not getting selected by a latch that determines if it should draw the sprite’s colors, or draw the background (in transparent parts of the sprite). So into the schematics I go…

Solution: None yet.

Update #1: Well, fat lot of good that did. I could only find schematics for Burgertime, and not even the cassette version (which the Cook Race hardware seems to follow) for that matter. This one is starting to collect dust on the shelf.

Update #2: David Widel said on his web page (www.widel.com) that he was looking for a Cook Race board. I contacted him about it and he said that he would be interested in it so I gave it to him. Better to further the arcade/multigame cause than to have it sitting on my shelf collecting dust.

Dig-Dug (“Has a ROM Error”)

Purchased described as “Has a ROM error“. Started by creating a JAMMA adapter, and then read the EPROM at 2E, it was not found under Romident, burned and installed a replacement. No change. Removed and read all ROMs in row/column 2, and all but one of them failed to be identified by Romident, burned and installed 5 more replacements, working! Still have to wire up an amplifier to correctly test the sound, but looks good so far.

[07/30/03] I finally found the brain cell that got me to realize that I could use my inductive listener (a telecom tool, often used with a tone tracer) to test the sound. It works!

Solution: Replaced bad ROMs

(Recently, the board is starting to develop an intermittent problem with a bad socket. I am going to replace it as the first use of my soon-to-be-here combination soldering/desoldering station.)

Gyruss (Konami, bootleg)

Boots and passes self-test, but immediately coins itself up and starts playing itself(!), although not too well.

Well, it looks like some of the inputs are firing rapidly and randomly. Grounding one of the enable pins on one of the 74LS253s seems to make it settle down for a few seconds, so I will try playing with it.

[07/30/03] Update #1: OK, it looks like one of the outputs (za) is always low on the 74LS253, regardless of its inputs. Will try swapping it out.

Solution: None yet.

Kicker (Konami)

Random garbage (no sprites) and occasional random sounds, reboots randomly. Clock looks good, CPU and bus address and data lines have what appears to be otherwise normal activity (i.e. nothing appears stuck or floating). Pulled EPROMs and Romidented them; Romident does not identify all but 2 of them, and the two that are identified are not identified as Kicker ROMs!

OK, so I pull the EPROM archive for Kicker, and match them up that way. Three of them match up, four do not. Hmmm… One of the EPROMs does not erase(!). Going digging for a replacement…

Solution: None yet.

Galaxian – “Dead”

Purchased described as “dead”. Started by creating a JAMMA adapter (I hate creating adapters, it is tedious work). Well, the description was correct – she is dead alright: screen has static garbage and required some tweaking to sync correctly on my test bench monitor.

Watchdog is barking, disabling it has no effect on the screen’s contents. Board already had some previous work done in it, solder-side contains more than 20 jumps to connect some RAMs back onto the bus. The Parts side shows the missing/removed/blown traces being jumped.

Started by checking the daughterboard, seems OK. Next I remove, socket and replace the 74LS245s on the board because word has it that they tend to be the cause of most problems, the Galaxian Trouble Shooting Logic Board manuals lists similar symptoms connected to those chips, and the Fluke 9010 troubleshooter says that the address lines are tied. Other than that, I cannot come up with a good way to check them! 🙂

Gotta wait for some replacement sockets and chips to come in…

Continue reading Galaxian – “Dead”

PAC-MAN (Midway, single board)

Board 1


Flashing “1” in corner of screen. Took a look at the Pac-Man troubleshoot by picture guide and that pointed me to “4R video RAM bad”. Swapped it, no good!

Tried swapping other RAMs, no change either. Started pulling all socketed chips and found a bent pin on the ROM at 6E! straightened it, and reinserted, Pac lives once more.

That will teach me to try the simple checks/fixes before the more complex ones…

Solution: Fixed bent pin on a ROM chip.

Board 2

Game would boot normally, but would then start getting random lines/glitches through the screen after running for a couple of minutes; they did not otherwise effect gameplay. Immediately suspect video RAMs, start hitting ’em with the freeze spray and sure enough, got a bad one. Replaced it, and all is well!

Solution: Replaced bad RAM chip.